Wednesday, July 10, 2019

Waterfall Scripture Mixed Media Album #1

We are in the heat of Summer now. I am enjoying being in my air conditioned craft studio creating. It is my gel plates 1 year birthday.  I have been using it a lot this summer and finding more and more fun ways to make prints and use those prints in my mixed media projects. I have a fun little mixed media album to share with you. It is a modified waterfall. I had made waterfall cards before and had fun making them. The other day I saw a mixed media artist Candace Harris make an album using her mono prints. I was inspired to do the same.


The first page of my album is probably my favorite. All the scriptures on the album were from stamps I have in my collection. I don't know the manufacture of most of them. However, I do know that the scripture on this one was from an old Our Daily Bread stamp set called Don't Worry.  The bird on this page is from STAMPlorations set called. TRENDY BIRDS 2 The scalloped lines are from a STAMPlorations set called IT'S A GIRL THING SUNSHINE.  The inside of the bird is a retired set from STAMPlorations called Mini Mixed Media Backgrounds.  I stamped the bird and painted it with white acrylic paint. The white acrylic paint gives a "new canvas" that I could water color on. I water colored it with brown and blues. I then stamped the bird on a post it note and made a reverse mask. I then stamped the music notes over the bird. I then used a white gel pen to add some highlights. 


When making this gel print I used ARTplorations stencil called LUPINUS.

I used STAMPlorations FAITH EXPRESSIONS. I watercolored the hands. 


This print used bubble wrap and a background stamp by Unity that I dipped in black acrylic paint.

I used IT'S A GIRL THING SUNSHINE on this page as well. I stamped the little hearts and flowers. I used colored pencils on the hearts and  white acrylic paint and water coloring for the flowers

To make this print I used ARTplorations stencil called RAG RUG

The next page is probably my second favorite one. I stamped the flower using STAMPlorations set called BLOOMING BUDS  and again the scalloped edge from ITS A GIRL THING SUNSHINE. I added random dots and lines with the gel pen and black ink pen. Again I used white acrylic paint and watercolored the flower. This scripture is from the same Our Daily Bread set called Don't Worry.

Isn't this a fun print? I used ARTplorations LUPINUS  I liked how the flowers turned out. But my favorite part was the two black "lines" that I got on the print by using the edge of an old gift card dipped in black paint. 

Last page of this waterfall album I stamped the funky flower from ITS A GIRL THING Sunshine. I painted with white acrylic paint. and water colors. I added dots and the line at the top with a white gel pen. I stamped the music notes from the Mini Mixed Media Backgrounds set. 


You can really see the ARTplorations RAG RUG stencil with the white acrylic paint on this print. 


STAMPlorations is having a Summer Clearance sale 40% off selected items. Check it out HERE.

Faith Expressions  that I used on this project, is one of the sets on sale. 


I am sharing this project on the STAMPlorations Linky Party for

Thursday, July 4, 2019

STARS and STRIPES

 This week's MIXability Challenge: STARS AND STRIPES
really got me going. I wanted to use my gel plate to make a flag. I tried several times. Once I remembered to put the 'blue' part in the right hand corner because when you print it needs to be on that side to make a print on the left side. I got several good prints. But I wanted more than just a print. So I took those prints and I die cut stars out of them. I got one that I really liked. I used that on this card. I added a couple more stars. I outlined them with a black marker and I stamped a newsprint stamp on them. I used the scraps of my prints and cut them apart with decorative scissors. YES I still have my decorative scissors. I glued them to a piece of kraft paper. Then I wondered what I would use for the blue section. Then I noticed, on my desk, some blue sparkly washi tape that was given to me last week by a new stamping friend. It was almost too sparkly so I decided to add some cheesecloth to "countrify" it.  I took a white gel pen and scribbled the "white" lines on the flag. I added a "Happy Birthday" sentiment. It could have been for the birthday of our nation but I am going to use it as a birthday card for the pastor at my  church.
After I made my patriotic color themed prints. I decided to just have fun. I used colors that I don't usually use. I used coral, yellow, teal, black and white. The ghost print, below is what I used for the background. The first print I forgot to take a photo of, I cut into stars. 


I decided to add teal colored thread and gold thread looped to add some texture to the card. 

These are the stars. I outlined them with a black marker. I also printed 
Isaiah 40:26
Lift up your eyes and look to the heavens:
    Who created all these?
He who brings out the starry host one by one
    and calls forth each of them by name.
Because of his great power and mighty strength,
    not one of them is missing.

I cut the scripture into strips and I decide to just use the first line.

After I glued the stars down, I decided to run it through my cuttlebug with an embossing folder. I added gold metallic rub on the raised parts. I also splattered gold watercolor paint. I added teal and blue to the strips of sentiments. 
I used the decorative scissors to make the black mat. 


Thursday, June 27, 2019

Chalk it up to a new experience (Tutorial)

I created this tutorial for the SCS mix-ability challenge that I am hostessing this week.


Chalk on gel plate tutorial for Bible journaling page

1. I took my clean gel plate and placed on my craft table. (It doesn't look completely clear because it has been used to create. Don't expect it to look like it is new.)


2. I placed a STAMPlorations stencil called Floral Flutes onto the gel plate. Because the gel plate has a little stickiness, the stencil is held in place.


3. See my lovely used set of SU chalks? I also used my very expensive q-tip applicators. LOL

4. I used mostly blue and greens. I used the same q-tip to just dip into the next color. That let the colors mix a little on the plate.


5. I only added color to some of the spaces. 


6. I gently pulled the stencil up off of the plate. This is what was left on the plate. 


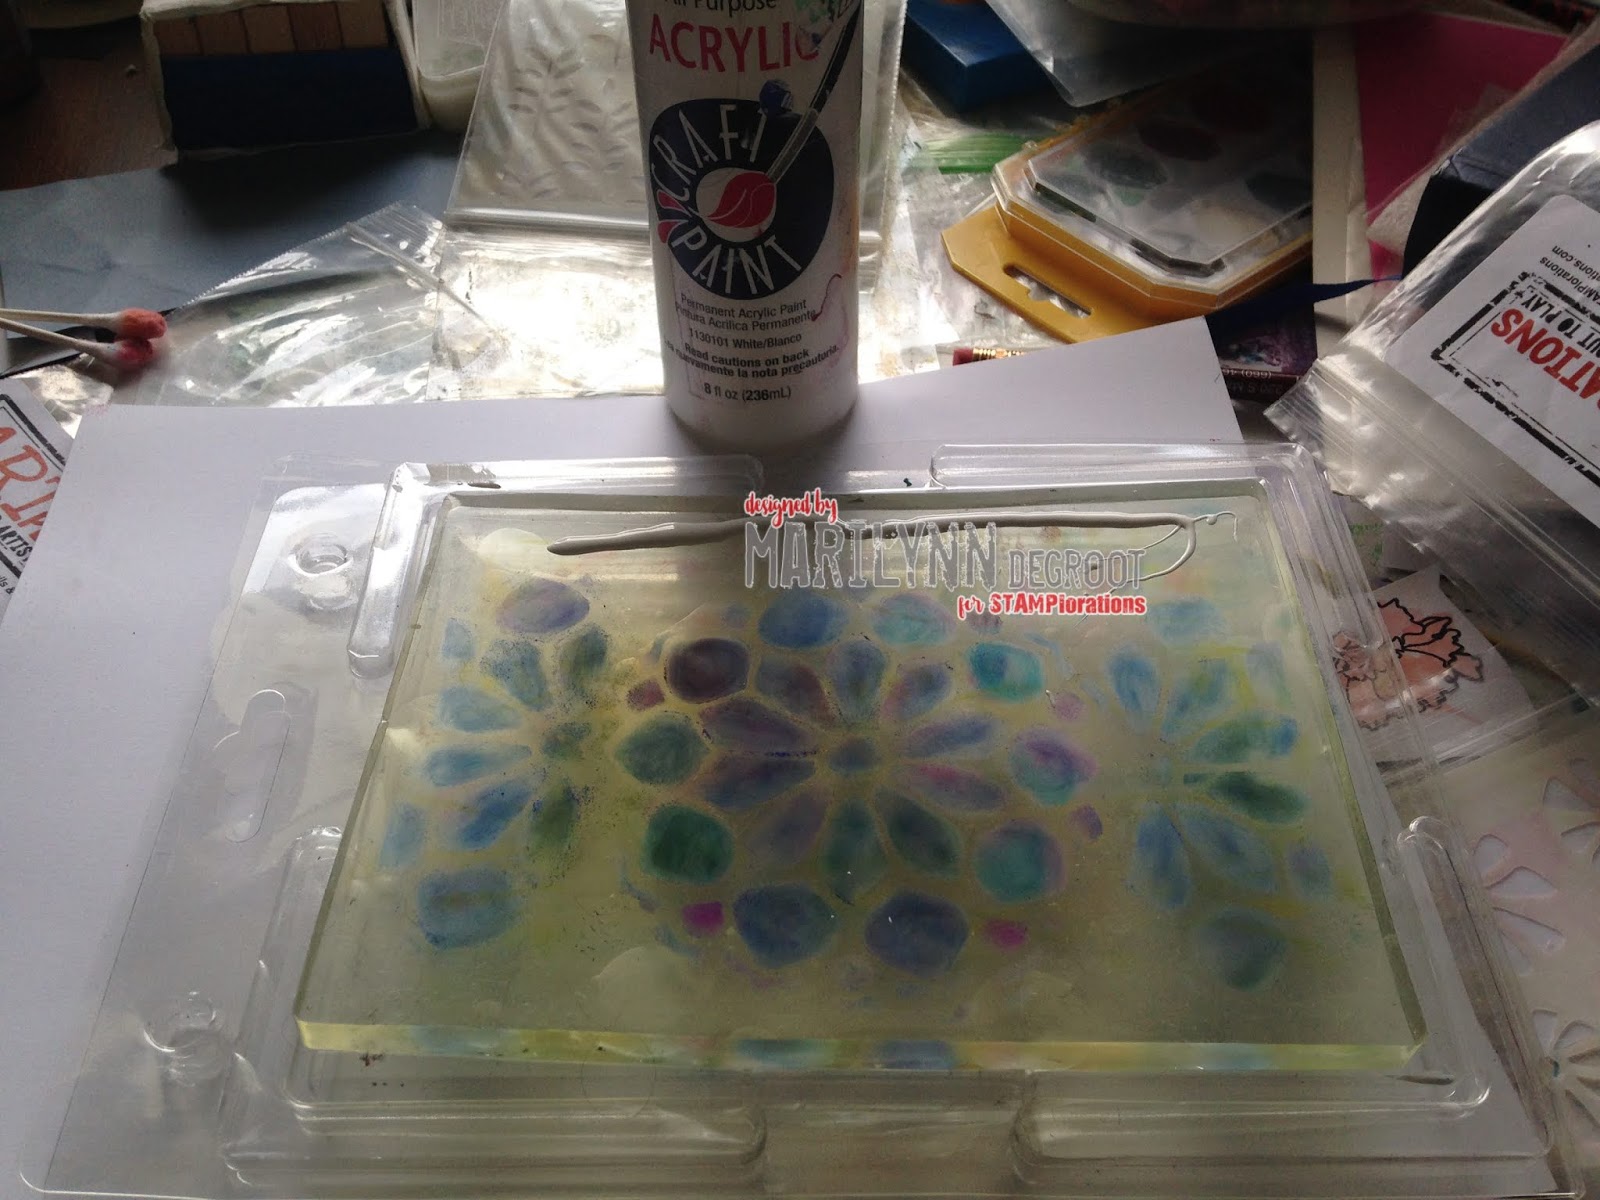
7. I put a thin line of white acrylic paint at just the top of the plate and then I rolled it out all over the plate using my brayer.


8. Since I have been using my gel plate more, I have been wanting to try it in my art journaling Bible. I was a little nervous to do this because if I didn't like how it turned out, I couldn't undo it. 
My art journal Bible has a blank page on the right side all the way through. 


9. I took a piece of scrap paper and covered the left side of the Bible and then I turned the gel plate over and pressed like I was 'stamping" it onto the page.  Then I slowly pulled it off and this is the end result. Isn't it fabulous? What I really like about this technique is that because of the layer of acrylic paint it is sealed and doesn't smear. 

10. I used SNSS Nature Silhouettes 2 stamps and some alphabet stamps and my own handwriting to finish the page. I also highlighted the letters with a white gel pen. I thought I was 'done' but I decided to cover the left side of the bible with white scratch paper and I splattered some gold ink and some blue and green ink.


Close up photo


11.  I made several more prints just by adding a layer of white paint. Here is a photo of the 2nd and 3rd ghost prints.


I made 10 more prints and I washed my plate with a few drops of dawn dish soap. 
The one thing about chalks is it sill stain the gel plate a little bit. This looks like it would be a problem.


But these are 4 prints that I did after I washed my plate. You can see from these photos that the way my plate looks didn't affect the results.  if I had to choose between having a spotless super clean plate and a stained plate because I had fun playing with it, there is no competition. I choose the fun.


Friday, June 21, 2019

Light shine.


This little light of mine... I'm gonna let it shine... let it shine let it shine... let it shine....

That song was going through my head as I was making these cards. Do you know what is more magical than seeing lightning bugs or fireflies? Getting to see them through the eyes of a child discovering them for the first time. The other day my grandson Noah got to see them. He was jumping up and down and kept saying there is another one, and another one as he pointed them out to me. I took the time to explain to him chemiluminescence. Which is the fancy word for chemicals mixed together that make light. We talked about that more when we broke the glass to mix the chemicals in the "light sticks".  I am so glad I was blessed with the opportunity to make that memory with him. 


My friend Kyra hosted the mixability challenge on Splitcoast. She said to make a Sparkle and shine card as summer cards. Of course fireflies and fireworks came to my mind. Since she did fireworks, I went with fireflies. 

I have a huge stash of cardstock that I monoprinted. It was so much fun the other day I couldn't stop. Now I have lots of paper to use.


 I pulled one from that stash and I drew a jar and lid with a pencil.


I sketched where I wanted my fireflies.


I took a white gel pen and drew the "lights". I did the big one where I had sketched the fireflies. I also added little dots to be the host of flies with them. 


I took some light colored pencils. I drew circles around the big "lights"


 I took a black pen and went over the pencil marks on the jar and lid.


I used the black pen to draw the wings and flight "squiggles". I then used my pencil to hand letter my sentiment. I went over the sentiment with my black ink pen and erased the pencil marks when the ink was dry. I used the white gel pen to highlight the jar and the lettering. 


My trio of light shine cards.


Sunday, June 2, 2019

June Mixed media STAMPlorations


  • You can link up as many projects as you want (1 project per blog post)
  • Projects can be anything -- including cards -- but stencils must be used
  • Non-STAMPlorations products are OK
  • To qualify for the prize, you must display challenge graphic and link back to the challenge post (blogs only)
  • Prizes: $15 GC for the winner (voted by the team); $5 GC to three (3) randomly picked players

The other day I did a tutorial for the STAMPlorations blog on how I used chalk and my ARTplorations stencil called Bold Florals.  You can see that tutorial HERE. I really liked how the colors looked and wanted to make a CAS card to showcase the pretty stenciled flowers. I first thought I would add some butterflies but they didn't look right. So I decided to just stamp the scripture using STAMPlorations Great is Thy Faithfulness stamp.