
There is exciting news with STAMPlorations. Not only is the new store up and running, but there are so many new things in the store. One of those is the new line of SLIMLINE STENCILS.

That is why STAMPlorations is having a Blog Hop.
Commenting on the blog hop will end on August 19th and the winners will be announced on the STAMPlorations blog on August 21st.
prizes for the blog hop:
- choice of 3 slimline stencils
- $10 gift code
winners will be randomly drawn from all comments left on the
STAMPlorations blog and participating designers' blogs
My first thought when I saw them was that they will be perfect to use in my bible since my journaling bible has tall narrow pages.

I made journaled two pages in my bible using two of these new stencils.
I used:
I used:
and
After making gel prints for several years, One of the things I am still learning and working on is layering. So for my two projects that I am sharing I started with similar layering. I didn't use the stencil for this part, I just put paint on my gel press. I used pinks browns oranges and yellows.

How the paint looked after I brayered it on the gel press

How my print looked when I pulled it up from the the gel press. I let this dry before adding the next layers.

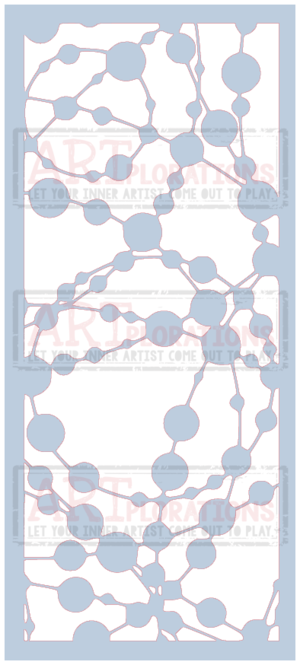
I put the strung lights stencil down on the gel press and put blue and turquoise paint down. This is how the press looked after I lifted the stencil.

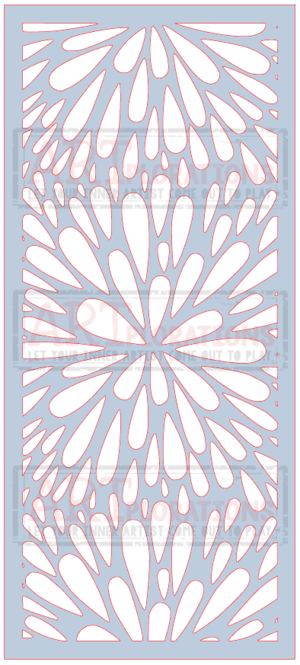
I got so excited I forgot to get a photo when I added the burst with green. I then layered strung lights with white and blue as the final layer. This is the resulting print. Don't you love the colors and the textures that layering stencils gets?

Now this was a little bigger than my bible so I put the dried print into my bible

I flipped my bible over and traced around the edges.

This is what it looked like after I traced it. I then cut along the pencil line.

Here is how my print looked.
It was so pretty I could have left it like this but I kept on going.

I used the floral stamps from STAMPlorations
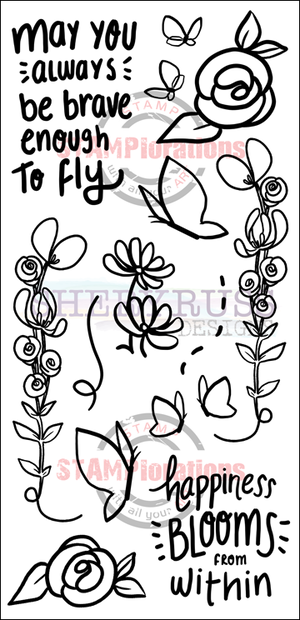

I then carefully painted the insides of the stamp with white acrylic paint.

Then I took a marker and and added pink for the roses and green for the leaves.
Then I penciled in the scripture.

I then went over the pencil with a black sharpie marker. I added white highlights with a white gel pen. Then I glued it into my bible.

The second page I journaled started like the first with pink yellow orange for the base. I layered the strung lights stencil over the first layer with dark teal, blue, and turquoise. To me the darker blue really made the little "strung lights" shine bright. Next time I use this stencil I think I will use more yellows on the base. Here is the slightly larger print than my bible. I did the same thing that I did on the first page of tracing and cutting it down to size.

I penciled in the scripture and then went over the pencil with sharpie marker and added white highlights to the letters to make them stand out. This photo shows the difference the white highlights make.

Glued into my bible. For some reason when I cut it I missed part of the corner and the bottom. So to make it less noticeable, I painted with teal blue. I kinda like it like that.

- all throughout August, all slimline stencils are 20% off with code
posted on the store
BUT if you use my 20% off designer code
STAMPGIRLMARILYNN
to buy at least 1 slimline stencil, a not-yet-released slimline
stencil will be included in your order (limit 1 free stencil per
customer).
